How to right-click convert images in Windows

- devops
ImageMagick is a powerful image-processing tool that can handle a wide range of image conversion and editing tasks. With a little setup, you can integrate ImageMagick into Windows’ SendTo menu, enabling you to convert images via a right-click context menu.
In this guide, you’ll learn how to:
- Install ImageMagick.
- Create batch scripts for conversion (e.g., JPG to PNG and PNG to JPG).
- Add these scripts to the SendTo menu for quick access.
Step 1: Install ImageMagick
- Download ImageMagick:
- Visit the ImageMagick official website and download the appropriate version for your Windows system (64-bit or 32-bit).
- Install ImageMagick:
- Run the installer and ensure the “Add application directory to your system path” option is checked. This will make the
magickcommand available in the command line.
- Run the installer and ensure the “Add application directory to your system path” option is checked. This will make the
- Verify Installation:
- Open a Command Prompt and type:
magick -version - If installed correctly, it will display the version and other details of ImageMagick.
- Open a Command Prompt and type:
Step 2: Create Batch Scripts for Conversion
To use the SendTo menu, you need to create batch scripts that handle specific image conversions.
1. Create a Batch Script to Convert JPG to PNG
- Open Notepad and paste the following code:
batCopy code<code>@echo off :: Check if the input file is a JPG set "ext=%~x1" if /i "%ext%"==".jpg" ( magick "%~dpnx1" "%~dpn1_converted.png" echo Successfully converted "%~nx1" to PNG. pause ) else ( echo This script only processes JPG files. pause ) </code>
- Save the file as
`convert_to_png`.bat.
2. Create a Batch Script to Convert PNG to JPG
- Open Notepad and paste the following code:
batCopy code<code>@echo off :: Check if the input file is a PNG set "ext=%~x1" if /i "%ext%"==".png" ( magick "%~dpnx1" "%~dpn1_converted.jpg" echo Successfully converted "%~nx1" to JPG. pause ) else ( echo This script only processes PNG files. pause ) </code>
- Save the file as
`convert_to_jpg`.bat.
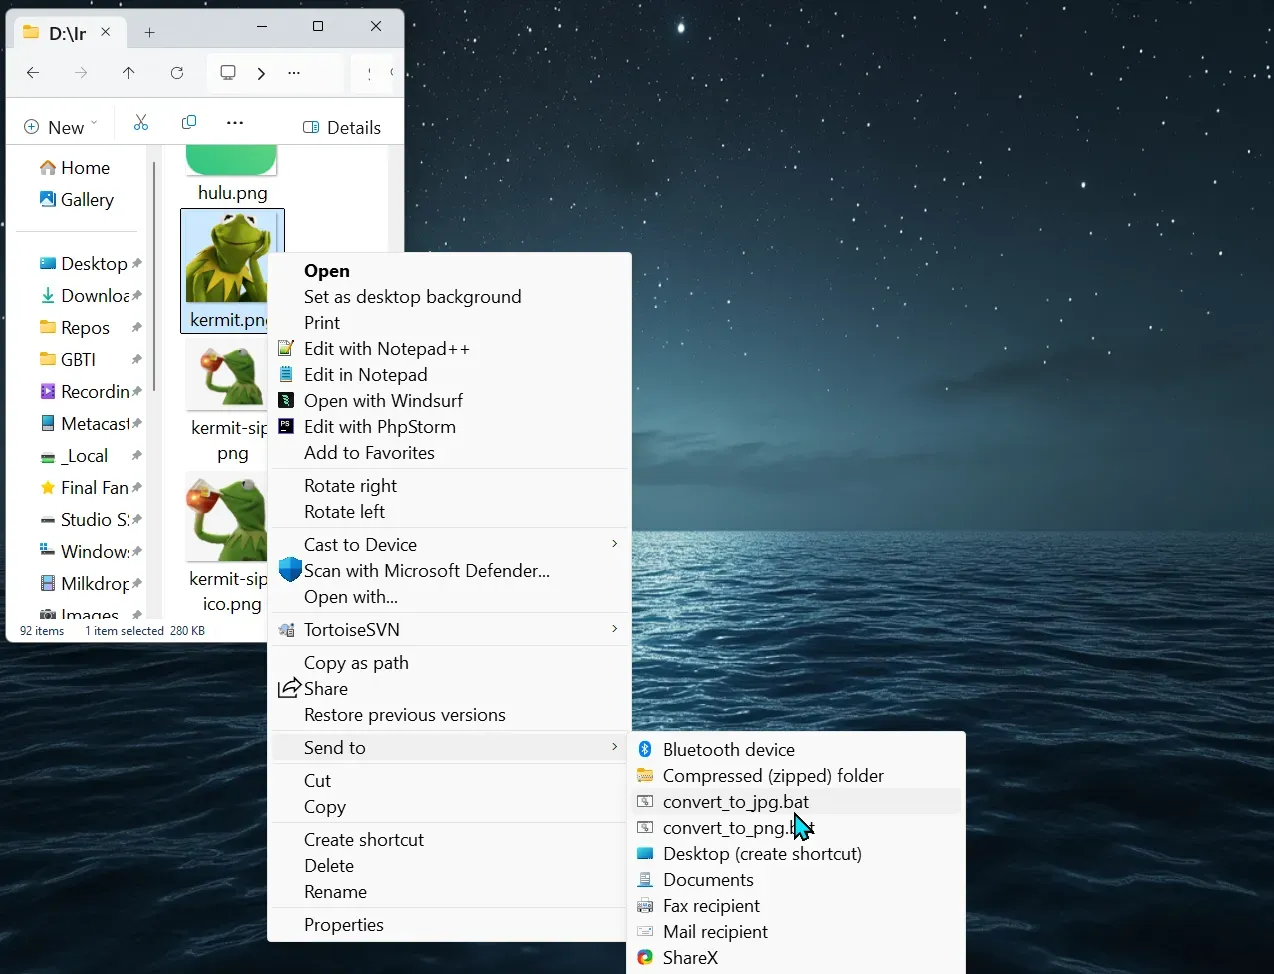
Step 3: Add Batch Scripts to the Right Click “SendTo” Menu
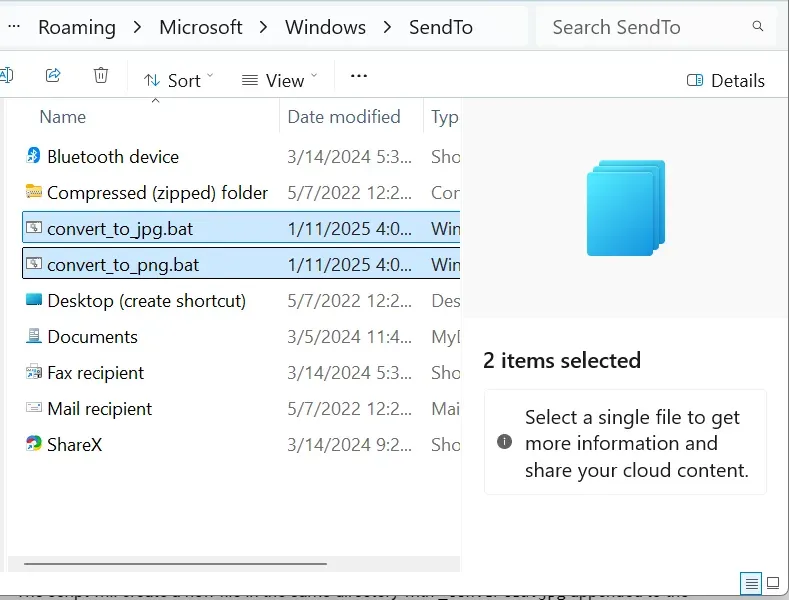
- Locate the SendTo Folder:
- Press Win + R, type cmd, and press Ctrl + Shift + Enter to run Command Prompt as Administrator.
- In the Command Prompt window, type: batchCopyEdit
explorer shell:sendto - Press Enter. This should open the SendTo folder with administrative privileges.
- Add the Batch Scripts:
- Copy
convert_to_jpg.batandconvert_to_png.batinto the SendTo folder.
- Copy
Step 4: Test the Right-Click Conversion
- Convert a JPG to PNG:
- Right-click a
.jpgfile. - Navigate to Send To > ConvertJPGToPNG.bat.
- The script will run and create a new file in the same directory with
_converted.pngappended to the name.
- Right-click a
- Convert a PNG to JPG:
- Right-click a
.pngfile. - Navigate to Send To > ConvertPNGToJPG.bat.
- The script will create a new file in the same directory with
_converted.jpgappended to the name.
- Right-click a
Optional: Batch Process Multiple Files
You can modify the batch scripts to handle multiple files at once:
batCopy code<code>@echo off for %%I in (%*) do ( set "ext=%%~xI" if /i "!ext!"==".jpg" ( magick "%%~dpnxI" "%%~dpnI_converted.png" echo Successfully converted "%%~nxI" to PNG. ) else if /i "!ext!"==".png" ( magick "%%~dpnxI" "%%~dpnI_converted.jpg" echo Successfully converted "%%~nxI" to JPG. ) else ( echo Skipping "%%~nxI" - unsupported file type. ) ) pause </code>
This script processes all selected files at once, skipping unsupported formats.
Tips for Using ImageMagick with SendTo
Advanced Image Manipulation:
Add ImageMagick options for resizing, compressing, or applying effects to your images. For example:batCopy codemagick "%~dpnx1" -resize 50% "%~dpn1_converted.png"
…
By integrating ImageMagick with the Windows SendTo menu, you can quickly convert images with a simple right-click. This approach is lightweight, customizable, and leverages the full power of ImageMagick for batch processing or advanced image manipulation.
We hope you enjoyed this article! Please leave a comment below with your tips and recommendations.
Convert SVG to PNG
@echo off setlocal enabledelayedexpansion :: Set default width and height set width=24 set height=24 :: Prompt user for width and height (Press Enter to keep default) set /p inputWidth="Enter the desired width (default: 24): " if not "%inputWidth%"=="" set width=%inputWidth% set /p inputHeight="Enter the desired height (default: 24): " if not "%inputHeight%"=="" set height=%inputHeight% for %%I in (%*) do ( set "ext=%%~xI" set "ext=!ext:~1!" if /i "!ext!"=="svg" ( echo Converting "%%~nxI" to PNG with dimensions %width%x%height%... :: Convert SVG to PNG, maintaining transparency and optimizing size magick "%%~dpnxI" -density 300 -resize %width%x%height% -define png:compression-level=9 -define png:compression-filter=5 -define png:compression-strategy=1 -strip "%%~dpnI.png" echo Successfully converted "%%~nxI" to PNG with dimensions %width%x%height%. ) else ( echo Skipping "%%~nxI" - unsupported file type. ) ) pause


0 Comments
No comments yet. Be the first. Members comment from the GBTI local client, where comments are submitted as pull requests and auto-published for paid members.
Become a memberMembers write comments from the GBTI client or browser extension. Become a member to join the conversation.